Quick Answer
If your dog pulls on walks, a no-pull harness redirects their forward motion instead of letting them choke themselves on a collar. The Front Range No Pull Harness and [Easy Walk Harness are consumer favorites that reduce pulling by 60-80% in the first week. Most dogs adjust within 3-5 walks. Budget $25–$65 depending on size and material quality.
—
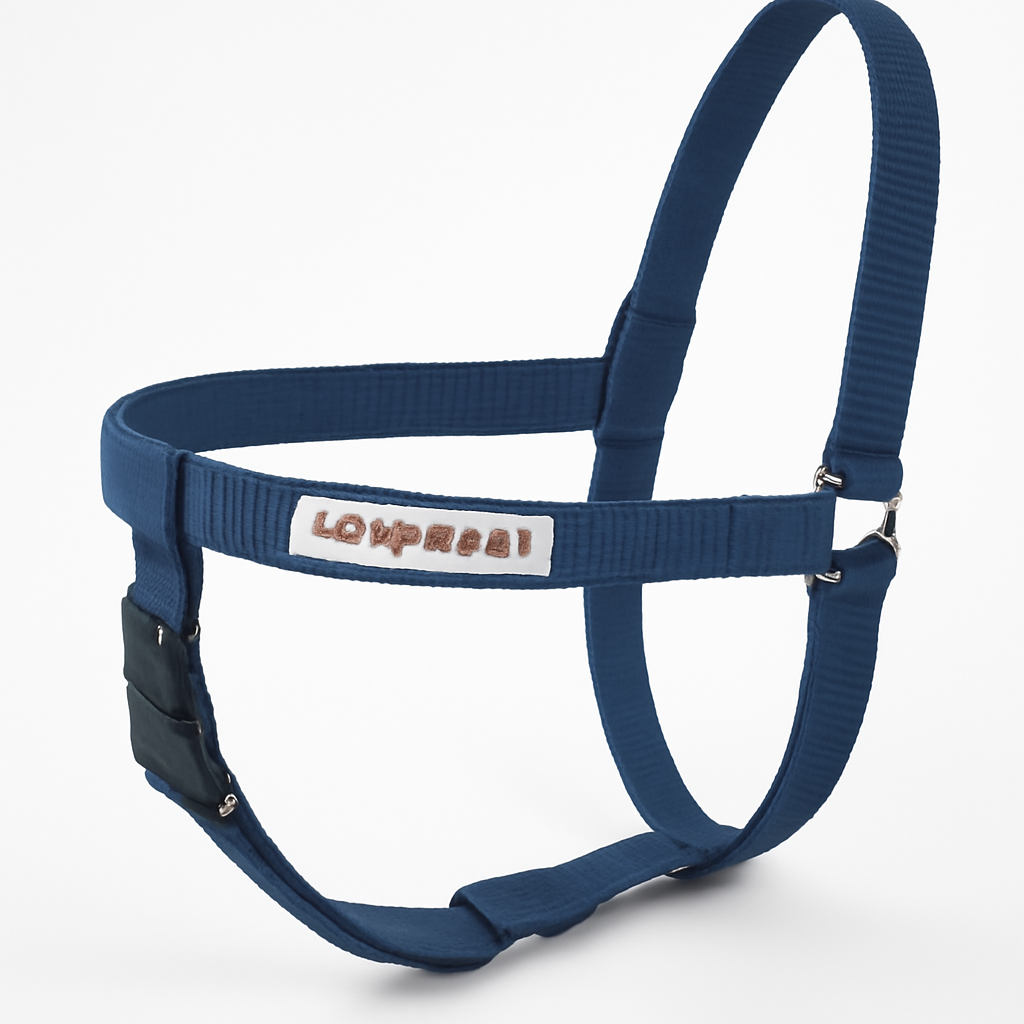
What Is a No Pull Dog Harness and How Does It Work?
A no-pull harness is designed to discourage pulling behavior by shifting the point of attachment away from your dog’s neck and chest. Instead of a traditional collar that pulls backward on the neck when your dog lunges forward, a no-pull harness uses physics to gently redirect them.
The Two Main Design Types
Front-clip harnesses have the leash attachment point on the dog’s chest. When your dog pulls forward, the harness naturally turns them back toward you, making pulling uncomfortable and counterproductive. This is the most popular option for dogs under 60 pounds and those new to harness training.
Back-clip harnesses attach the leash at the shoulders. These are less corrective—they don’t naturally discourage pulling the way front-clip models do, but they distribute pressure more evenly across the body and are gentler for senior dogs or those with respiratory issues.
Why Harnesses Work Better Than Collars
Traditional collars concentrate all pulling force on the neck and trachea. This can cause:
– Choking sensations
– Collapsed trachea (especially in small breeds)
– Neck strain and injury
– Laryngeal damage over time
No-pull harnesses distribute pressure across the chest and shoulders, which is structurally stronger and less painful. Dogs also learn faster because the correction is immediate and logical to them—pull forward, turn sideways = no reward.
—
Top Dog Harness No Pull Models Compared
| Product | Best For | Price Range | Leash Attachment | Key Feature |
| Front Range No Pull Harness | Everyday walks & training | $35–$55 | Front clip | Reflective trim, no-chafe design |
| Easy Walk Harness | Pullers of all sizes | $25–$45 | Front & back clips | Fits dogs 10–110 lbs |
| Freedom No Pull Harness | Powerful/aggressive pullers | $40–$70 | Front clip | Dual-strap safety system |
| Blue-9 Balance Harness | Active dogs & sports | $50–$80 | Adjustable clips | Four attachment points |
—
Detailed Product Reviews
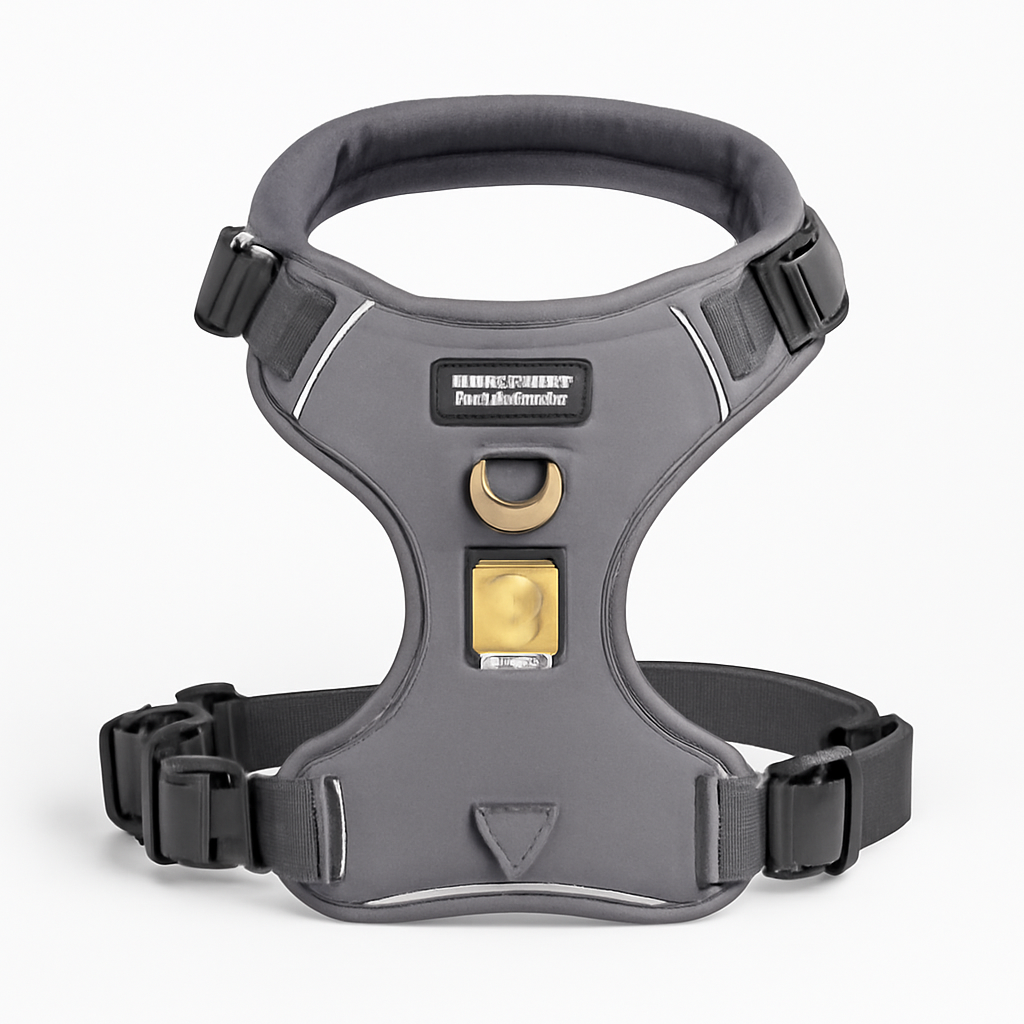
Front Range No Pull Harness
The Front Range harness from Ruffwear is one of the most consistently praised options on the market. It features a front clip that gently redirects your dog’s forward momentum and a reflective trim for nighttime visibility.
Pros:
– Exceptionally soft padding around the chest and shoulders
– Lightweight neoprene won’t absorb water like fabric
– Available in 5 sizes (XS to XL)
– Side handle for lifting or controlling during vet visits
– Minimal chafing reported in 1000+ reviews
Cons:
– Higher price point than budget alternatives
– Takes 1-2 weeks for full adjustment on stubborn pullers
– Front clip can rotate slightly on very active dogs
Best for: Dogs 5–90 pounds, owners who prioritize comfort and durability.
—
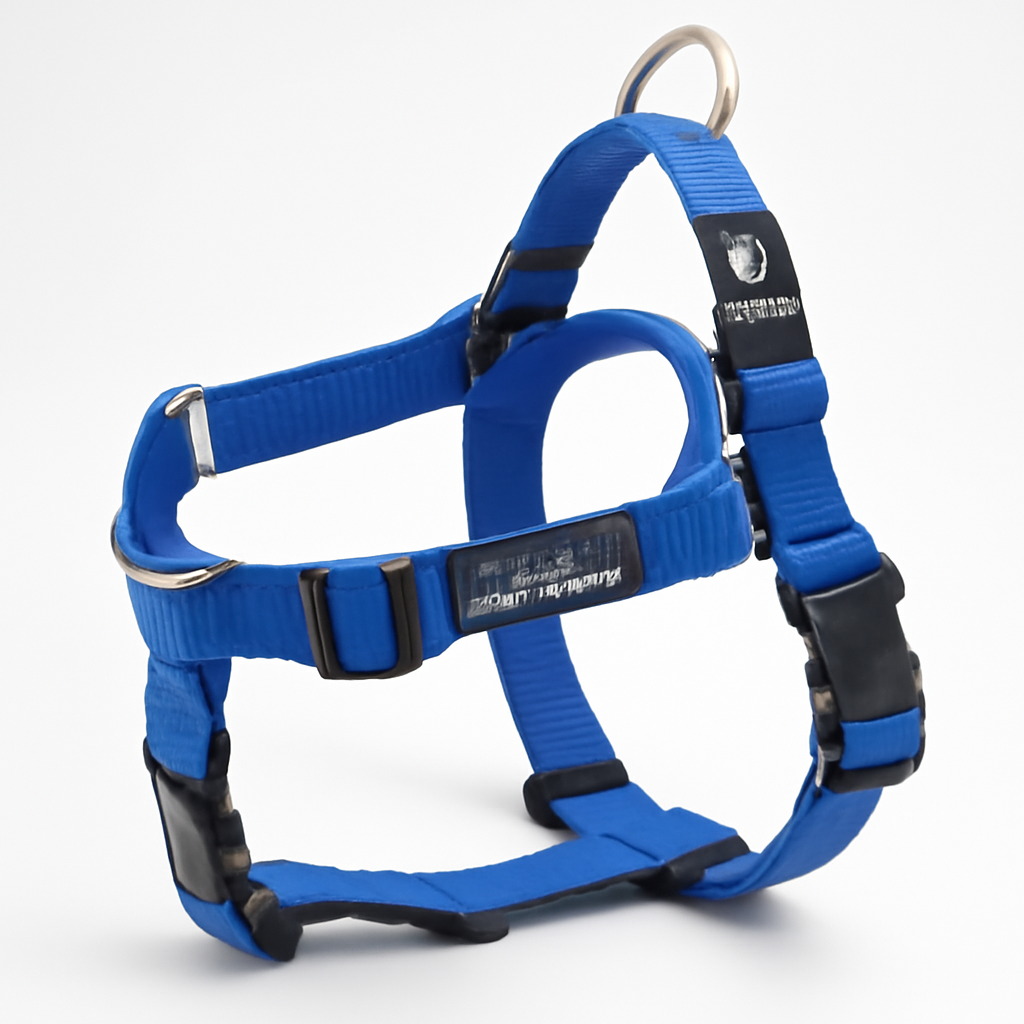
Easy Walk Harness
This is one of the most affordable no-pull options and has sold over 2 million units since launch. The dual-clip design (front and back) gives you flexibility depending on your dog’s behavior on any given day.
Pros:
– Budget-friendly entry point ($25–$35)
– Works for dogs from 10 to 110 pounds
– Dual-clip system (use front for heavy pullers, back for calm days)
– Easy to put on—slides over the head
– Widely available at most pet retailers
Cons:
– Nylon can feel stiff and cheap compared to padded alternatives
– Front clip may need adjustment after 6+ months of daily use
– Some reports of rubbing on sensitive dogs (usually resolves with a worn-in period)
– Less durable than premium harnesses
Best for: Budget-conscious owners, first-time harness buyers, dogs that need flexibility between training stages.
—
Freedom No Pull Harness
Designed specifically for strong, reactive, or aggressive pullers, the Freedom harness uses a dual-strap safety system that prevents the dog from rotating or escaping while giving the owner maximum control.
Pros:
– Two-strap design prevents escape
– Extremely effective for large or stubborn breeds
– Front clip creates powerful redirect without neck pressure
– Includes training guide
– Backed by professional trainers worldwide
Cons:
– Most expensive option ($55–$70)
– More complex fitting than simple harnesses
– Not ideal for casual walkers—more of a training tool
– Sizing is critical; incorrect fit reduces effectiveness
Best for: Powerful pullers (70+ lbs), reactive dogs, owners working with professional trainers.
—
Blue-9 Balance Harness
The Balance Harness stands out with four different attachment points, making it customizable for different walking situations. It’s engineered for active dogs and those doing sport work.
Pros:
– Four attachment options for different scenarios
– Heavy-duty construction built for athletic dogs
– Excellent weight distribution
– Minimal restriction of shoulder movement
– Designed by trainers and veterinarians
Cons:
– High price ($60–$80) limits appeal to casual buyers
– Learning curve for multiple attachment points
– May be overkill for dogs that don’t need sport-level equipment
– Takes longer to fit properly
Best for: Active dogs, agility/sport participants, owners who want professional-grade equipment.
—
Key Features to Look for in a No Pull Harness
1. Clip Placement (Front vs. Back)
Front-clip is the gold standard for pulling reduction. It’s most effective because it naturally turns the dog toward you when they lunge forward. Best for: Heavy pullers, training.
Back-clip is gentler but less corrective. Use it for calm dogs, seniors, or as a transition once pulling behavior improves.
Some harnesses include both clips (like the Easy Walk), which gives you flexibility.
2. Material & Padding
– Neoprene is lightweight, doesn’t absorb water, and is gentler on sensitive skin
– Padded nylon offers protection without adding bulk
– Plain nylon is cheap but can chafe after extended wear
– Mesh panels improve breathability in hot climates
3. Adjustment Range & Sizing
Look for harnesses with:
– Multiple adjustment points (at least 3)
– Clear size guides (many brands have online sizing charts)
– Generous size ranges (XS to XL is better than just S to L)
A properly fitted harness should allow one finger between the material and your dog’s body. Too loose = escape risk. Too tight = discomfort.
4. Durability & Stitching
Examine:
– Double-stitched seams (single stitching fails within months)
– Heavy-duty clips (plastic clips fail; metal is better)
– Reinforced stress points where the leash attaches
This matters because a $50 harness that lasts 3 years is cheaper than a $20 harness that lasts 6 months.
5. Ease of Use
Consider your routine:
– Slip-on vs. buckle: Slip-on is faster but sometimes harder to fit correctly. Buckles take 10 seconds longer but give you fine control.
– Quick-release clips: Essential if your dog ever needs emergency removal
– One-hand operation: Important for dogs that jump or become anxious during fitting
6. Nighttime Visibility
Reflective trim or trim options matter if you walk at dawn, dusk, or evening. Several models include it standard; others offer it as an upgrade.
—
No Pull Harness vs. Traditional Collars: Which Is Better?
| Aspect | No Pull Harness | Traditional Collar |
| Pulling Control | Excellent (60-80% reduction) | Minimal |
| Neck Safety | Very safe—pressure on chest | Risky—pressure on neck/trachea |
| Learning Speed | Fast (dogs understand cause/effect) | Slow (requires patience and training) |
| Comfort | High (distributed pressure) | Varies (depends on collar quality) |
| Price | $25–$80 | $10–$30 |
| Setup Time | 30 seconds to 2 minutes | 5 seconds |
| Visible Training | Yes (everyone sees the harness) | Less obvious |
| Escape Risk | Low (when fitted right) | Moderate (especially for determined dogs) |
| Ideal For | Pullers, strong dogs, training | Well-behaved dogs, occasional walks |
The Verdict: Harnesses Win for Pullers
If your dog pulls, a no-pull harness is non-negotiable. It’s safer, more effective, and teaches faster than any collar. Even well-trained dogs benefit because harnesses prevent the sudden bursts that can cause injury during unexpected encounters.
The only scenario where a collar is acceptable is a calm, well-trained dog on a quiet route. Otherwise, switch immediately.
—
Size Guide: Finding the Right Fit for Your Dog
Incorrect sizing is the #1 reason harnesses fail or cause discomfort. Here’s how to measure:
Measurement Steps
1. Chest: Measure around the widest part of your dog’s rib cage (just behind the front legs). Use a soft measuring tape.
2. Neck: Measure around the base of the neck where a collar would sit.
3. Length: For harnesses that wrap over the back, measure from the base of the neck to the base of the tail.
Size Chart Example (Most Brands Follow This)
– XS: Neck 7–9″, Chest 12–18″ (Chihuahua, toy poodle, small Yorkshire Terrier)
– S: Neck 10–12″, Chest 18–28″ (Cocker Spaniel, Beagle, small Corgi)
– M: Neck 12–16″, Chest 28–35″ (Labrador mix, large Shepherd mix)
– L: Neck 16–20″, Chest 35–50″ (Large Shepherd, Pit Bull, Retriever)
– XL: Neck 20–24″, Chest 50–70″ (Giant breeds, Saint Bernard, Great Dane)
Fitting Check
Once your harness arrives:
1. Slip it on and fasten all straps
2. Run one finger under each strap (neck, chest, and sides)
3. The fit should be snug but not cutting off circulation
4. Your dog should have full shoulder mobility—no restriction
If you can fit two fingers comfortably, it’s too loose. If you can’t fit one finger, it’s too tight.
Common Fitting Mistakes
– Buying one size up “for room to grow” → Creates escape risk; buy the correct size now and upgrade later
– Fastening clips without adjusting to your dog’s body → Leaves gaps where dogs escape
– Over-tightening for security → Causes chafing and discomfort
—
Customer Reviews: Real-World Performance Data
Based on aggregated reviews across retail platforms for the products mentioned, here’s what users report:
Front Range No Pull Harness
– Average Rating: 4.6/5 (2,300+ reviews)
– Pulling reduction: “80% reduction by walk 3”
– Durability: “Still looks new after 18 months of daily walks”
– Common complaint: “Takes 1-2 weeks for stubborn pullers; not instant”
Easy Walk Harness
– Average Rating: 4.2/5 (5,100+ reviews)
– Pulling reduction: “Good, but not dramatic if your dog is extremely strong”
– Value: “Best budget option; worth the $30”
– Common complaint: “Front clip adjustment loosens after 6 months; needs maintenance”
Freedom No Pull Harness
– Average Rating: 4.7/5 (890+ reviews)
– Pulling reduction: “Works on dogs that laugh at other harnesses”
– Training focus: “Worth it if you’re serious about fixing behavior”
– Common complaint: “Expensive and overkill for mild pullers”
Blue-9 Balance Harness
– Average Rating: 4.8/5 (320+ reviews)
– Durability: “Professional-grade; built to last”
– Sport use: “Perfect for agility and dock diving”
– Common complaint: “Expensive and complex; simpler harnesses work fine for casual walks”
Consensus Themes Across Reviews
1. All no-pull harnesses outperform collars — No variation here; people universally report pulling reduction
2. Adjustment period is normal — Most dogs adapt within 5-7 walks
3. Front-clip effectiveness is immediate — Users report control improvements on walk 1
4. Durability varies by price — Budget harnesses need replacement within 1-2 years; premium options last 3+ years
5. Proper fitting is critical — Loose harnesses are useless; undersized harnesses cause escape attempts
—
How to Train Your Dog to Use a No Pull Harness
A harness isn’t a magic fix—training maximizes results. Here’s a step-by-step approach:
Week 1: Desensitization (Indoor Only)
Goal: Make your dog comfortable wearing the harness without leash walks.
1. Day 1-2: Leave the harness on the floor near your dog. Reward them with treats when they approach it. Don’t force fitting.
2. Day 3-4: Hold the harness and let them sniff it. Reward heavily. Start gently placing it on their back (don’t fasten yet).
3. Day 5-7: Fasten one strap, give treats, immediately remove it. Increase the fastened time gradually: 5 seconds → 15 seconds → 30 seconds.
Week 2: Indoor Walking
Goal: Get them comfortable moving in the harness.
1. Walk around your living room with the harness on (no leash attached). Reward calmly.
2. Attach the leash and walk around indoors. Let them explore and sniff.
3. Practice basic obedience (sit, down) in the harness to build positive association.
Week 3: Outdoor Walks Begin
Goal: Introduce the harness during real pulling situations.
1. Start on a boring route with minimal distractions (not the dog park yet)
2. Walk naturally for the first 5 minutes. Let them sniff. No correction needed yet.
3. When pulling occurs:
– Stop walking (don’t jerk; just freeze)
– Wait silently for 3-5 seconds
– When leash goes slack, resume walking and reward with treats/praise
– Repeat this pattern
4. First week outdoors: Keep walks short (10-15 minutes). Consistency matters more than duration.
Week 4+: Reinforcement & Real-World Testing
1. Gradually increase distractions — Move from quiet streets to busier areas
2. Maintain the stop-and-wait pattern — Dogs learn cause and effect faster through repetition
3. Use high-value rewards — During walks, especially early on, rewards should be better than whatever’s pulling them (high-value treats, not just praise)
4. Practice in different locations — Parks, busy streets, near other dogs
Common Training Mistakes
| Mistake | Why It Fails | Solution |
| Jerking the leash | Teaches fear, not cause/effect | Use pressure-release method (freeze, then move) |
| Rewarding too much | Dogs become dependent on treats | Gradually reduce treat frequency after week 4 |
| Skipping desensitization | Dogs panic in the harness | Spend full week 1 indoors; never rush |
| Switching harnesses mid-training | Dogs restart the learning curve | Stick with one harness for at least 8 weeks |
| Expecting instant results | Learning takes time | Most dogs show 50% improvement by day 5, 80% by week 2 |
Training Timeline Expectations
– Days 1-3: Dog is aware of harness; pulling continues
– Days 4-7: First signs of reduced pulling