# Best Ergonomic Keyboards for Carpal Tunnel 2026
Quick Answer
If you’re experiencing wrist pain from carpal tunnel syndrome, you need a keyboard that supports your natural hand position rather than forcing your wrists into uncomfortable angles. The best ergonomic keyboards for carpal tunnel relief feature a split or curved design, negative tilt, adjustable height, and mechanical switches that don’t require excessive force. The Kinesis Advantage360 CHECK PRICE], [Microsoft Sculpt Ergonomic Keyboard CHECK PRICE], and [Logitech Wave Keys [CHECK PRICE] are top choices that combine proven pain relief with reasonable pricing.
—
What Makes a Keyboard Ergonomic for Carpal Tunnel Relief
Carpal tunnel syndrome develops when the median nerve gets compressed in your wrist—and your keyboard choice directly impacts whether you’re helping or hurting yourself. A standard flat keyboard actually increases compression because it forces your wrists into an extended (bent backward) position for hours at a time.
An ergonomic keyboard for carpal tunnel relief needs to address several specific issues:
Wrist Neutral Position: Your hands should rest in a “neutral” position where your wrists are straight (not bent up, down, or to the side). This reduces pressure on the median nerve.
Reduced Wrist Extension: A keyboard that encourages a slightly downward angle (negative tilt) keeps your wrists from hyperextending backward, which directly aggravates carpal tunnel.
Support for Natural Hand Spacing: Your hands aren’t the same width as a standard keyboard. A split design lets each hand rest at its natural angle, reducing the strain of reaching inward.
Lower Activation Force: Keys that require less pressure to activate mean less muscle tension in your forearms and wrists throughout the day.
Palm and Wrist Support: Built-in or compatible wrist rests keep your palms elevated and supported during typing, preventing your wrists from dangling.
The difference isn’t subtle. People with carpal tunnel who switch from a standard keyboard to a proper ergonomic option report significant pain reduction within days to weeks.
—
Top Ergonomic Keyboards Reviewed for Carpal Tunnel Support
Kinesis Advantage360 [CHECK PRICE]
Best For: Severe carpal tunnel symptoms; users who want maximum customization
The Kinesis Advantage360 is the gold standard for carpal tunnel relief, though it’s not cheap. This split keyboard features deep key wells that cradle each hand at its natural angle, reducing the need to reach and strain. The columnar key layout (keys are arranged in columns rather than the staggered QWERTY pattern) matches your finger movements more naturally, requiring less hand repositioning.
Key Features:
– Split design with 22-degree inward angle for each hand
– Adjustable thumb cluster for different hand sizes
– Programmable keys and macros
– Mechanical switches with low actuation force
– Negative tilt (keyboard slopes downward toward you)
Pros:
– Specifically designed for carpal tunnel and RSI prevention
– Highly customizable for different hand sizes
– Very durable build quality
– Improves typing speed after adjustment period
Cons:
– Steep learning curve (takes 1-2 weeks to adjust)
– Significant upfront cost
– Overkill if you have mild symptoms
– Not suitable for laptop use or frequent travel
—
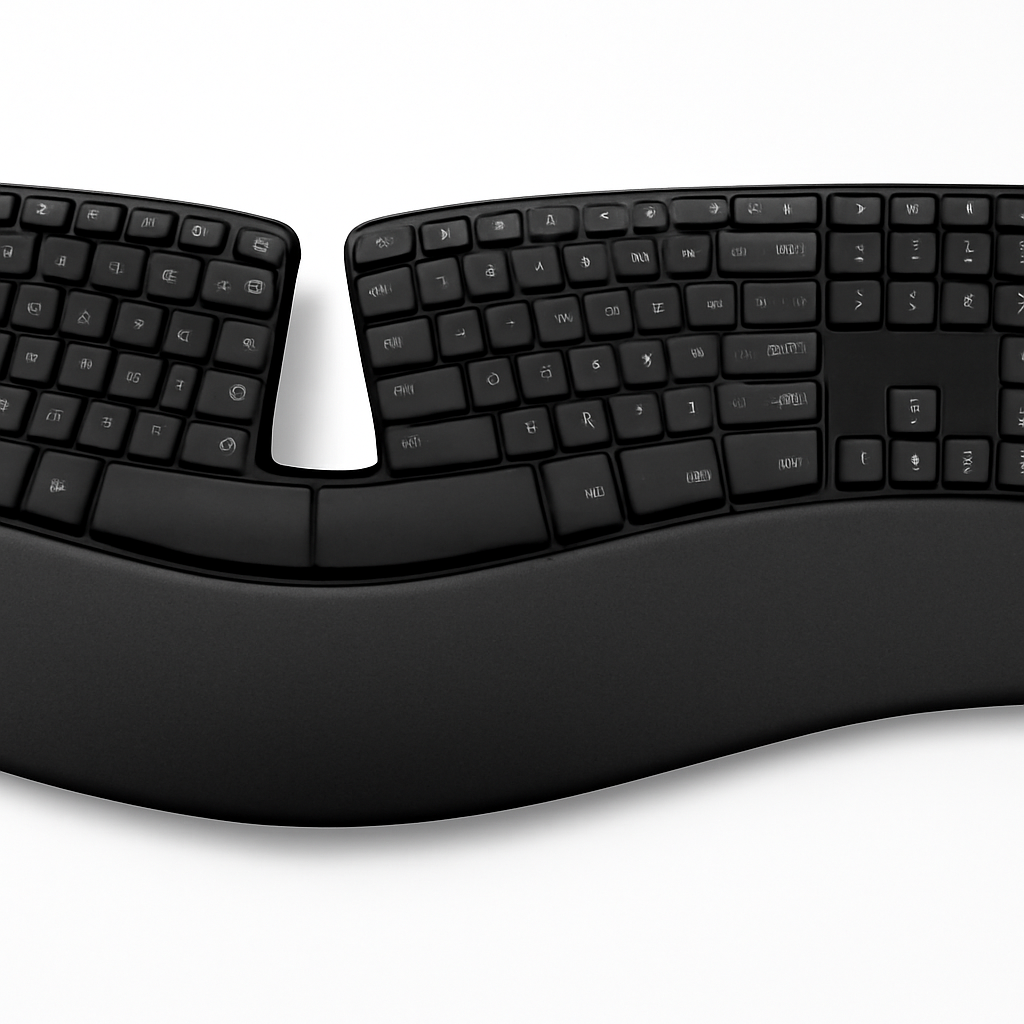
Microsoft Sculpt Ergonomic Keyboard [CHECK PRICE]
Best For: Budget-conscious buyers; mild to moderate carpal tunnel pain
The Microsoft Sculpt is a mid-range option that delivers genuine ergonomic benefits without the extreme learning curve of split keyboards. The curved wrist rest and split key layout accommodate your natural hand position reasonably well.
Key Features:
– Split key design with curved keys
– Integrated wrist rest with cushioning
– Negative tilt design
– Low-profile mechanical keys
– Wireless (2.4GHz dongle)
Pros:
– Significantly cheaper than advanced ergonomic options
– Minimal learning curve—feels normal within a day
– Effective wrist rest prevents dangling wrists
– Wireless eliminates cable clutter
Cons:
– Not as precisely engineered as the Kinesis
– Wrist rest can feel too firm for some people
– Less key programmability
– Smaller than standard keyboards (may feel cramped)
—
Logitech Wave Keys [CHECK PRICE]
Best For: Casual users; those who want subtle ergonomic help
If you have mild carpal tunnel symptoms or want preventative ergonomics without major adjustments, the Logitech Wave Keys offers a gentler approach. The subtle curved wave in the keybed (hence the name) follows your hand’s natural contours.
Key Features:
– Gentle wave shape in the keyboard design
– Wrist rest included
– Quiet, low-profile keys
– Wireless connectivity
– Standard key layout (minimal learning curve)
Pros:
– Very affordable entry point
– Familiar layout—works immediately
– Quiet typing for open offices
– Compact and portable
Cons:
– More subtle ergonomic benefits than specialized keyboards
– May not be enough for severe symptoms
– Wrist rest is basic
– Positive tilt on some setups can be problematic
—
Herman Miller x Logitech Ergonomic Keyboard [CHECK PRICE]
Best For: Premium buyers; professional environments
This collaboration combines Herman Miller’s workplace ergonomics expertise with Logitech’s keyboard technology. It’s designed by ergonomicists and feels like an investment in your long-term health.
Key Features:
– Divided keyboard layout (split design, but less extreme than Kinesis)
– Integrated cushioned palm rest
– Negative tilt with multiple height adjustments
– Mechanical switches with 60g activation force
– Premium aluminum construction
Pros:
– Beautifully designed (looks professional, not medical)
– Substantial palm support
– Better than compromises, less extreme than Kinesis
– Excellent build quality
Cons:
– Premium pricing
– Still has a learning curve (though less than split keyboards)
– Not suitable for users with very severe symptoms
– Requires proper desk setup to work well
—
Top Picks at a Glance
| Product | Best For | Price Range | Learning Curve |
| Kinesis Advantage360 | Severe carpal tunnel; maximum relief | $$$$ | High (1-2 weeks) |
| Microsoft Sculpt | Budget buyers; mild-moderate pain | $$ | Low (1 day) |
| Logitech Wave Keys | Casual users; prevention | $ | Minimal |
| Herman Miller x Logitech | Premium buyers; professional use | $$$ | Moderate (3-5 days) |
—
Split vs. Curved Keyboards: Which Is Better for Wrist Pain
This is the most important decision you’ll make when shopping for a carpal tunnel keyboard.
Split Keyboards (Like Kinesis Advantage360)
How they work: The keyboard is literally divided in half, with each side angled inward at 15-22 degrees. Your left hand uses the left half, your right hand uses the right half.
Advantages:
– Eliminate unnatural inward reach
– Reduce shoulder tension
– Most dramatic pain relief for severe carpal tunnel
– Minimal strain on median nerve
Disadvantages:
– Steep learning curve
– Requires desk space
– Not portable
– Expensive
– Takes time to regain typing speed
Best for: People with moderate to severe carpal tunnel who are willing to invest time in adjustment.
Curved Keyboards (Like Microsoft Sculpt, Logitech Wave Keys)
How they work: The keys follow a gentle curved path without actually splitting. The keyboard is one piece, but shaped to accommodate your hands’ natural angle.
Advantages:
– Immediate usability (no learning curve)
– Less expensive
– Portable
– Familiar feel
– Good preventative option
Disadvantages:
– Less dramatic pain relief than true splits
– Hands still reach slightly inward
– May not be enough for severe symptoms
– Subtle benefits can feel underwhelming
Best for: Mild symptoms, prevention, or users who need to switch between multiple keyboards.
The Verdict
If you have severe carpal tunnel pain, a true split keyboard like the Kinesis Advantage360 will give you the best results—but only if you’re willing to spend 2-3 weeks adjusting. If your pain is mild to moderate, or if you need to use multiple keyboards, a curved option like the Microsoft Sculpt or Herman Miller x Logitech hybrid provides a more practical balance.
—
Key Features to Look For: Angle, Height, and Key Switch Type
When comparing ergonomic keyboards, focus on these three critical specifications:
Keyboard Tilt and Angle
Negative Tilt (Best): The keyboard slopes downward toward you (front lower than back). This keeps your wrists in a neutral position and is supported by every major ergonomics study on carpal tunnel.
Flat (Neutral): No slope. Better than positive tilt, but not optimal.
Positive Tilt (Avoid): The keyboard slopes away from you (front higher than back). This is the worst option for carpal tunnel because it forces your wrists to extend backward.
What to look for: Choose keyboards with negative tilt or adjustable tilt that allows you to set a negative angle. Many keyboards have fold-out feet on the back—flip them in to create the angle you need.
Height and Elevation
Your elbows should rest at roughly 90 degrees when your hands are on the keyboard. If your keyboard is too high, your wrists bend upward; too low, and you’re reaching down.
Ideal setup:
– Feet flat on floor
– Desk height at elbow height (roughly 28-30 inches)
– Keyboard at elbow height or slightly below
– Wrists in neutral position
If your desk is too high or too low, an adjustable keyboard tray or stand can fix this more easily than buying a new desk.
Key Switch Type
Different keyboards use different mechanisms. For carpal tunnel, you want switches that:
Require low actuation force (45-60g rather than 70g+)
Have tactile feedback (you feel when a keystroke registers, so you don’t have to bottom out)
Require minimal travel distance (less finger movement = less strain)
Mechanical switches (used in Kinesis and some gaming keyboards) generally offer better customization and lighter actuation than membrane switches.
Chiclet/low-profile switches (used in many wireless keyboards) reduce strain because your fingers don’t travel as far.
Membrane switches (cheap rubber dome keyboards) are the worst for carpal tunnel because they require bottoming out and provide no tactile feedback.
—
Keyboard Accessories That Enhance Carpal Tunnel Comfort
A great ergonomic keyboard is just the foundation. These accessories multiply its benefits:
External Wrist Rests
If your keyboard doesn’t include a built-in wrist rest, or if the built-in one isn’t adequate, an external rest provides crucial support.
What to look for:
– Gel or memory foam (more comfortable than firm plastic)
– Height that matches your keyboard
– Length that supports both wrists
– Non-slip bottom
Brands like Fellowes and HUANUO make quality wrist rests that work with any keyboard.
Keyboard Trays
An adjustable keyboard tray lets you position your keyboard at the exact height and angle your body needs, independent of your desk height.
Benefits:
– Negative tilt adjustment
– Height adjustment (up or down from desk level)
– Reduced desk clutter
– Works with any keyboard
Drawback: Adds cost and takes desk space.
Monitor Risers
If your monitor is too low, you’ll hunch forward and increase carpal tunnel strain. A monitor riser brings your screen to eye level, reducing the need to reach and hunch.
Keyboard Stands
Some ergonomic keyboards (like the Kinesis) benefit from a stand that keeps them at the optimal angle. These are often sold separately.
—
Budget vs. Premium: Finding Your Best Option
Your budget and symptom severity should guide your choice:
Budget Option ($40-80): Logitech Wave Keys
Ideal if:
– You have mild symptoms
– You want preventative ergonomics
– You need portability
– You use multiple keyboards
Why it works: The curved design and wrist rest provide meaningful improvement over standard keyboards at a price anyone can afford.
Limitation: May not provide enough relief for moderate to severe pain.
—
Mid-Range ($150-250): Microsoft Sculpt Ergonomic Keyboard
Ideal if:
– You have mild to moderate carpal tunnel
– You want a genuine ergonomic keyboard without extreme features
– You value quick adjustment and ease of use
– You want split-style benefits without the learning curve
Why it works: The split key layout, curved design, and integrated wrist rest hit a sweet spot of ergonomic benefit and practicality.
Limitation: Not specialized enough for severe carpal tunnel.
—
Premium ($$400+): Kinesis Advantage360 or Herman Miller x Logitech
Ideal if:
– You have moderate to severe carpal tunnel
– You’re willing to invest in your health
– You type for 8+ hours daily
– You’ve tried cheaper options and want maximum relief
Why it works: These keyboards are engineered specifically to eliminate carpal tunnel stress. The learning curve pays off through years of pain-free typing.
Limitation: Expensive, overkill for mild symptoms, requires adjustment time.
—
How to Set Up Your Keyboard Correctly to Prevent Pain
The best ergonomic keyboard won’t help if your desk setup is wrong. Follow these steps:
Step 1: Position Your Monitor
– Top of screen at eye level or slightly below
– 20-26 inches away (arm’s length)
– Centered in front of you
– Tilted slightly upward (negative tilt of 10-20 degrees)
Why: Prevents hunching, which increases carpal tunnel pressure.
Step 2: Adjust Desk Height
– Elbows at 90-110 degrees when arms are relaxed at your sides
– Desk should be slightly below elbow height
– Feet flat on floor (or footrest if needed)
Why: Keeps wrists neutral and prevents reaching or dropping.
Step 3: Position Your Keyboard
– Centered in front of your body (not off to one side)
– Negative tilt (use keyboard feet or adjustable tray)
– Immediately in front of you (no reaching)
Why: Eliminates awkward angles and reduces reaching strain.
Step 4: Add Wrist Support
– Wrist rest or palm rest positioned directly in front of keyboard
– Height matches your keyboard so wrists are neutral
– Prevents dangling wrists between keystrokes
Why: Supports median nerve and prevents repetitive strain.
Step 5: Take Regular Breaks
– Every 30-60 minutes, stand and stretch
– Perform wrist extension and flexion stretches
– Rest your hands completely for 5-10 minutes
Why: Prevents cumulative strain even with perfect ergonomics.
—
Our Verdict: Which Keyboard Should You Buy?
Your choice depends on your specific situation:
Start here if you’re unsure: Try the Microsoft Sculpt Ergonomic Keyboard [CHECK PRICE]. It’s the best balance of ergonomic benefit, ease of use, and affordability. Most people with mild to moderate carpal tunnel notice improvement within days. If it’s not enough, you can always upgrade later.
If you have mild symptoms or want prevention: The Logitech Wave Keys [CHECK PRICE] is an excellent entry point. It’s cheap enough to be a no-risk investment, and the subtle ergonomic improvements add up over time.
If you have moderate to severe carpal tunnel and are ready to commit: The Kinesis Advantage360 [CHECK PRICE] is worth the investment. Yes, it’s expensive and has a learning curve, but people with serious pain report life-changing relief. Budget 2-3 weeks for adjustment.
If you want the middle ground between comfort and premium: The Herman Miller x Logitech Ergonomic Keyboard [CHECK PRICE] splits the difference. It’s more specialized than the Sculpt but less extreme than the Kinesis, with professional-grade build quality.
Key Takeaways
1. Keyboard choice matters significantly. The difference between a standard keyboard and a proper ergonomic option is often the difference between pain and relief.
2. Negative tilt is essential. Make sure any keyboard you choose supports negative tilt (keyboard sloping downward toward you).
3. Split keyboards work better but require adjustment. If you’re willing to invest 2-3 weeks of learning, a split keyboard like the Kinesis provides the best carpal tunnel relief.
4. Curved keyboards offer practical benefits. Options like the Microsoft Sculpt provide meaningful ergonomic improvements without the learning curve.
5. Keyboard is just one part. Combine your choice with proper desk setup, wrist rests, breaks, and stretching for maximum relief.
6. You don’t need the most expensive option. A mid-range keyboard like the Microsoft Sculpt works better for most people than budget options, but doesn’t require premium pricing.
Start with the keyboard that matches your pain